Mesa Boogie Dual Rectifier "light" DIY
THE INFORMATION FOUND IN THIS DOCUMENT IS MEANT FOR PERSONS TRAINED IN THE MATERIA OF HIGH-VOLTAGE ELECTRONIC-APPLICATIONS. THE AUTHOR (NAMELY NK) IS NOT RESPONSIBLE FOR ANY KIND OF DAMAGE, INJURY, HARM OR DISABILITY DUE TO READER'S REPRODUCTION ATTEMPTS. ALSO, THERE IS NO GUARANTEE FOR THE CORRECTNESS, CONSISTENCY OR COMPLETENESS OF THIS DOCUMENT. BY READING FURTHER YOU AGREE ON THESE LINES.
UPDATE: This project is quite old now, all old project files are gone unfortunately. However, i still get request from many enthusiasts asking me for details. Thus, i decided to re-create all project files, and i am already working on it. It will take some time to complete them, i am really lacking time now. I plan to clone the old layout as much as possible, but will also provide modifications for more common parts to be used. Expensive and bulky Orange caps will be replaced by smaller Mallory-like ones, LDR/LED pairs will be replaced by relays for switching (resulting in a much more reliable circuit). The output power will eventually be reduced to 15W max by utilizing a pair of EL84 tubes. This would also significantly drop transformer requirements as well. All switches provided but not used on the PCB's will be removed.
4-4-2013: Here a new layout for the poweramp section. Assembles old layout as much as possible. Slightly improved routing and removed unused parts. Spacing for cathode and screen resistors enlarged in order to allow using 2, 3 or even 5 watt resistors. I intend using 1W for cathodes and 2W for screen resistors in the power stage. NOTE, for schematics (EAGLE) you will need to install a tube-library available on CadSoft's library page.
5-4-2013: A new variant of the switching matrix can be found here. The archive contains EAGLE files for both, schematic and the PCB layout. This variant implements the same functionality but uses relays for switching. The board also contains an additional rectifier circuit for V1A DC heating. Added LED terminals for the channel indication.
8-4-2013: PCB located part of the PSU filter added. Poweramp and switching slightly reworked again. Naming scheme for parts is still not entirely consistent, will correct when all schems are done. First verification of the switching, poweramp and PSU done, no bugs known so far. Feel free to re-check though !
After visiting my local music-store and playing a "Dual
Rectifier" i got the idea to "copy" this amplifier. Many sleepless nights were spent, many thoughts
were thought, and some bucks were given away. Before i continue, i need to mention, that i am not trying to
impress anyone by covering the great work of Mesa Corp. with a magic dust, writting "by N.Kim" on the
frontpanel. No, my intention was to modify the initial design a little, to create PCB’s, to lay out the
chassis properly according to my needs and wishes and to make the whole thing just a bit friendlier to replicate
(i am not talking about commercial replication here, i don’t need to tell ye, that its illegal. I am talking about “replication” in a DIY‐ sense, for folks who are into
music and vintage electronics).
After the „prototyping“-phase was done with success,
i built the end-version of the amplifier and documented it. The amplifier does its job quite well so far,
but still i am neither willing nor able to give you any guarantee about the correctness and consistency of information, what can be found in this document. I have said already, the main goal was to “copy” the “Dual Rectifier” and to keep this copy simple for guys willing and trying to do the same. These goals dictated the basic features: 1) Preamp 1:1 („single master“), After i knew, what to do, but before i could do, i had to answer the question “how to
do” ☺. PCB, Point-to-Point or handwired boards ? My decision was: PCB. I dont want to start the discussion yet
again, what is better. PCB is pretty neat, compact, easy to replicate and looks cool. Great. But if it comes to replace an
element or change some traces, it can soon become a tough job. Bad. Professional musicians decide irrational when it comes to "the gear". A Hobby-musician or/and Electronic-Hobbyist has to be more pragmatic. So, it is not a bad idea to make a short list "what the fun is gonna cost", before you decide "to build or not to build". Depending on what you already have and what you would like to have, the costs may lie in the range of 400-700 EUR. So, be sure, you have some extra coins to spend. Well, where i come from, you would not get a Dual Rectifer for 700 EUR, not even a Single Rectifier, and probably not even an used one. Whether financially attractive or not, you must decide for yourself, my main driving force was simply the enthusiasm of an e-hobbyist.
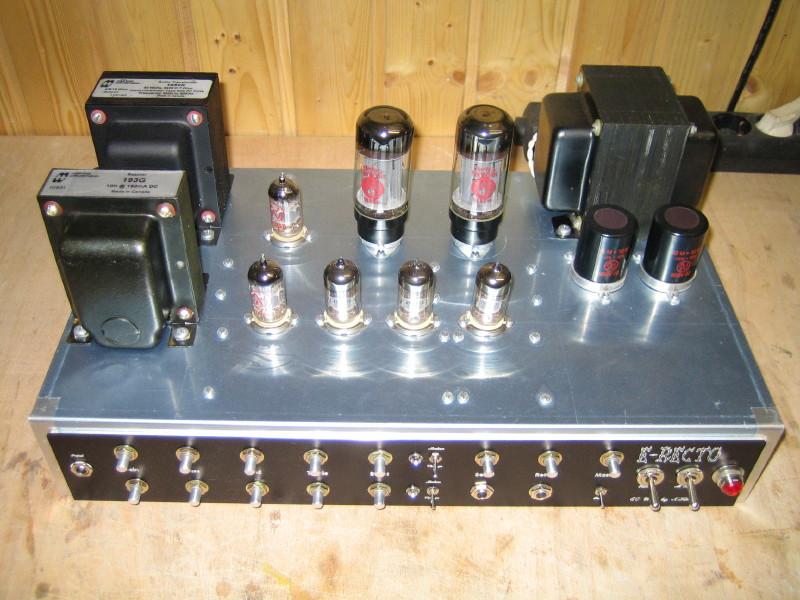
The chassis is made of a standard aluminium case (Hammond). The chassis,
tubes, sockets, pots, transformers and some capacitors i have obtained from Dirk at "TubeTown". Alternatively JJ-products (tubes and capacitors) can also be obtained from "TubeProfi" in Vienna (especially the capacitors are pretty good and cheap). The rest is
an ordinary stuff ordered by "Distrelec" (a huge sortiment) . The frontpanel is a
CNC-product made by "Schaeffer-Apparatebau". The way it looks inside.
Separate modules for each part to make tuning, diagnostics, checks and error-finding a bit
easier and to offer some space for future-experiments. Because PCB-based, the whole thing
can be built up pretty compact. Shrinking down to an ipod-size is probably not possible,
but you still can gain more space (if you need some) by replacing these huge "orange-
drop"-caps by smaller ones. You can see the poweramp to the left (2x6L6 GC) together
with the power-supply on the same board. In the middle the power-supply-filter and the
switching-matrix. Last, the preamp and the FX-loop is found on the right side of the photo.
I used jumper-connectors to connect boards to the switching-matrix, these drilled red/black-
cable-pairs are clearly recognizable on the picture. The channel-switching is done by
LDR/LED-pairs (controlled by a footswitch), the FX-loop is based on a simple mechanical
relais. "RED Vintage". Dusty. But still virgin-like and free of any
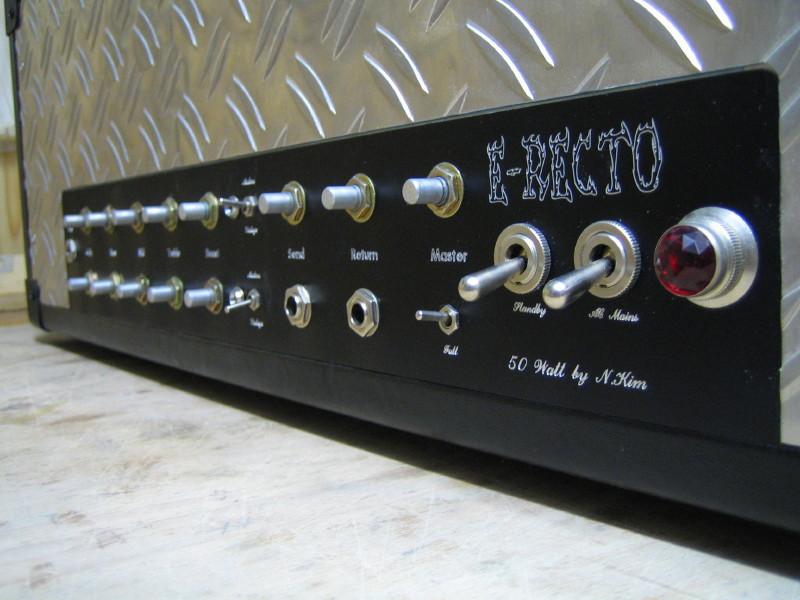
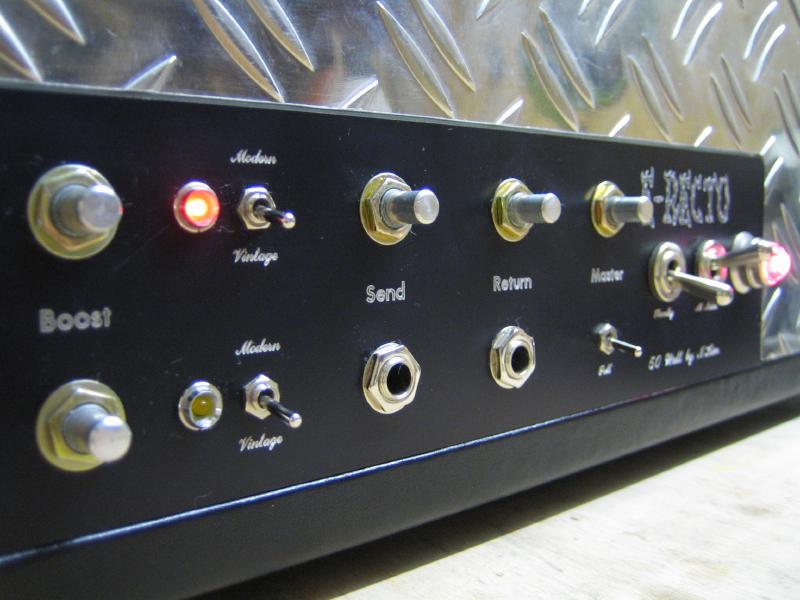
scratches. The jacks and the FX-controls are found on the frontpanel to make the handling more comfortable.
"Boost" means nothing but "Presence" in a common sense. The pots are still headless. Will
replace them by something funky later.
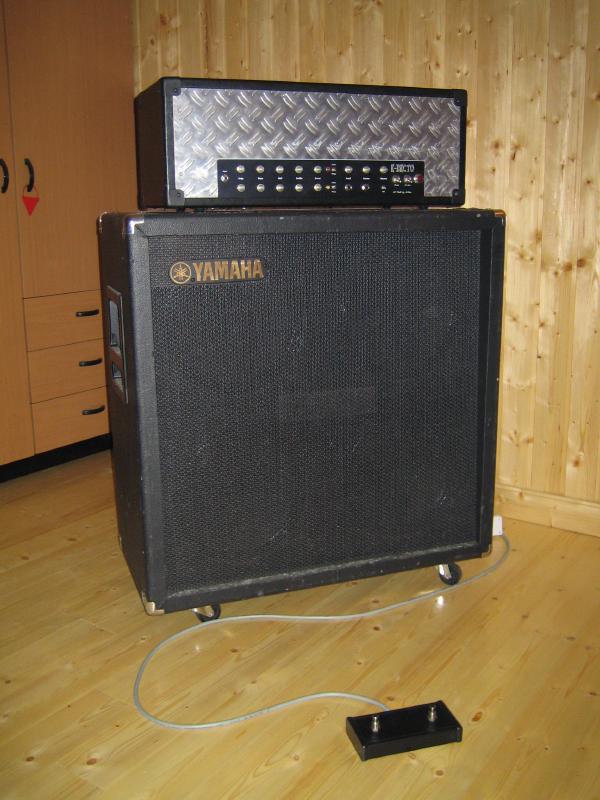
The half stack. Old YAMAHA-Box having
4 original Vintage 30 Speakers inside. Was offered to me for 280 EUR, i didn't hesitate too
long. Old, dusty, but ain't rusty yet. Okay, lets step to the main thing: the sound. To have
such a combo in a city apartment is like riding motocross in a sandbox. Ain't fun. I call
myself lucky for having a basement where my "lab" is located and all i produce
can be tested without driving anyone crazy, with exception of my parents, their dogs and
Mario (who is a budgie). Still, 50 watt are insanely loud in a 30m2 basement. You can feel
the loudspeaker pushing air against your breast. Kinda capable of sweeping away just
everything (doesnt matter if it has has ears or hearing aids or is a ninja turtle) within
a radius of 20m (if closed), really ear-crushing.
A short word about boxes. One sunny
and warm day i went to my local music-dealer and tested some of the boxes available. 1) Behringer
4x12 (model unknown): Ain't good, didn't like it, fizzy, thin, no mojo. 2) Peavey 4x12 (forgot the model): Slightly better, but
still not entirely satisfactory. 3) Framus 4x12: Very good for clean tunes, didn't look
to be suitable for high-gain though. 4) Yamaha 4x12 (Vintage 30 er): Ok, not bad. Celestion's at work, sounds pretty fine. 5) Mesa Boogie 4x12, very good too, not sure what kind of
speakers the box was loaded with, similar to the Yamaha above, a very smooth, yet aggressive sound My resume: A good box is worth looking,
searching and waiting. Do not save your money at the wrong end. You will be disappointed and blame your expensive toy for sounding like a
mice out of tune. Do not judge after connecting your amp to a 8"-Combo-Speaker for
testing purposes. Wait and test. People tastes differ, in my eyes, if you can obtain an
used 4x12" Vintage-30 box cheaply, go for it. A good box is as essential to a good
tone as the amp itself (assuming player's inability for a 'proper' intonation, just like in
my case :-) ).
The whole thing is technically pretty ok so
far, no hum, no hiss, no oscillation, does its job for almost five years now without making
any troubles. Speaking about sound, i can tell you, it is a heavy-metal machine, killing
gain, i am more into Marshall's territory, but my mom loves it for shredding. And hacking
powerchords is just great. For that the amp is just unbeatable. More than comparable to the
industry heads of the 50-class. Preamp (german only, english will
be added soon) Switching matrix (german)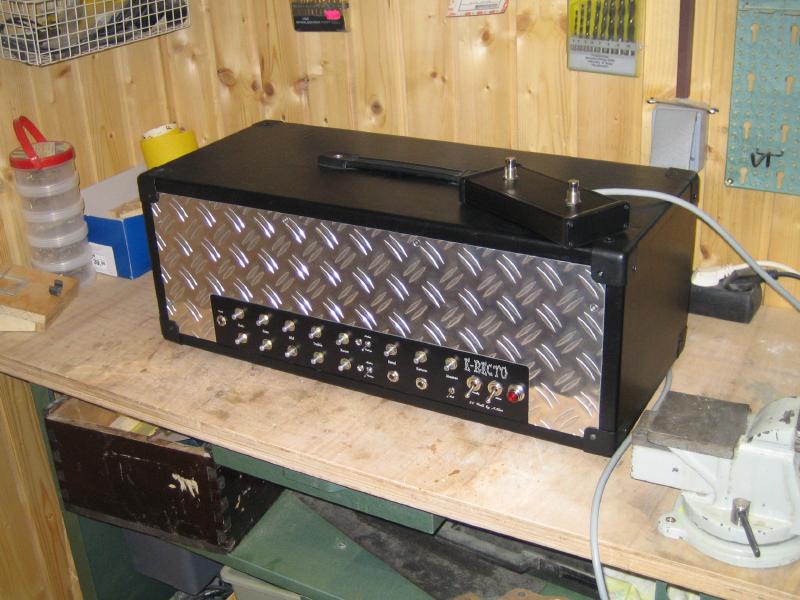
2) Effect-loop, poweramp 1:1,
3) Switching matrix (greatly) simplified,
4) 2-way foot-switch,
5) Max. power 50 Watt,
6) Extern connections reduced,
7) „ORANGE Clean“ present on-board but disabled,
8) Power supplies slightly modified.